Tuesday, November 25, 2008

Kentucky Voicing: Not Just for Audio


When I was a student at Berklee College of Music, I had the opportunity to work with many highly trained and experienced sound engineers who helped to shape the course of my career. One of those individuals was Dave Moulton, who at the time was the Chair of the Music Production and Engineering department.

Though there were many brilliant gems of audio wisdom which Dave shared with his students, one in particular which stands out in my mind was something Dave referred to as "Kentucky Voicing".

In theory, every recording or audio mix should be performed in an ideal acoustical environment... one which allows you to hear the sound as it was originally captured during recording. But in the real world, there really is no "ideal" environment. The acoustic quality of rooms can vary from studio to studio and even from day to day, speakers can alter the sound of a recording, and budgets often necessitate using less than perfect equipment which can add noise or worse into the environment. All of these factors can influence your mix.

Kentucky Voicing is a technique which can help you compensate for these factors and create consistent audio mixes by minimizing the effect of the equipment and environment on your decision making process during a mix. In essence, you use familiar recordings to create a "baseline" by which to judge your own mixes.

Here's how Dave Moulton describes the process of applying Kentucky Voicing to your own work:

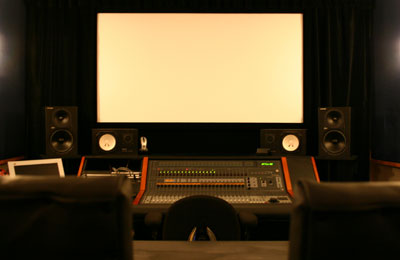
"First adopt a monitor that you can live with. This means (a) that you can afford it, (b) you can stand listening to it for extended periods of time, and (c) you find that you actually enjoy listening to your favorite recordings on it.

Second, thoroughly 'learn' at least five or six of your favorite recordings (at least) on this speaker system. Choose well-known and successful recordings (Steely Dan, for instance). Memorize 'the way they sound.' When mixing your own work, work towards emulating 'the way they sound' on your speaker system. This will give your recordings the best chance of sounding good over many different loudspeakers.

Third, when working on monitors other than your own, take along your 'reference' recordings and play them first, before you work on your own material. Get 'the way they sound' in your ears, and, to repeat, mix toward that sound quality. If your reference recordings sound bass-heavy, for instance, mix your own work bass-heavy. This will tend to neutralize the effect of the colorations of the different monitors on your work."


Applying the concepts of Kentucky Voicing to Images

When I first began working in film and video, I found that many of the tips and tricks I'd learned in the audio field could be applied to visual arts as well with a bit of adaptation and Kentucky Voicing was one of the first concepts I carried over.

In both film and video, footage is often color corrected as the last step in the production process before the project is distributed and/or broadcast. It's during this phase of production where the final contrast and brightness of the footage is determined, blacks are made black, whites are made white, and images are tweaked to create the perfect natural or stylized look.

Ask any colorist or television engineer and they'll tell you to NEVER attempt to color correct or balance images without using a calibrated broadcast monitor and video scope. But what if you can't afford to purchase a nice expensive calibrated broadcast monitor and video scope which can run well over ten thousand dollars? If you have to make do with a consumer television or computer monitor as your primary color correction monitor, why not apply the same techniques used in Kentucky Voicing to your images as well? Keeping with our theme, let's call it "Kentucky Viewing".

(Incidentally, I have no idea what any of these techniques have to do with Kentucky. The term was originally coined by Dave Moulton, and if I remember correctly, the technique just needed a name for descriptive purposes and it seemed as good a name as any. It does have a nice ring to it, doesn't it?)

First I would try to get your selected monitor as close to "calibrated" as possible. Some monitors and televisions have more controls than others, but at a minimum, you should be able to set the brightness, contrast, and hue to get the image in the ball park. I would strongly recommend using color bars to make your adjustments, but at the very least, find footage of something you know to be pure white and use that image to remove any color casts in the image.

Then, before you begin correcting any footage, pull out a few of your favorite movies or television shows and spend some time watching them on the monitor you've chosen. Notice the details in the image. How black are the blacks? How bright are the whites? Are white objects really pure white, or do they have a slight color cast?

Once you have a good idea what your favorite images look like on your work monitor, take a shot at color correcting your own footage using the same monitor. Try and make your images look like your reference footage. If you can, grab a still frame from your reference footage and keep it handy to use as a comparison.

On more than one occasion I've used this technique on my own projects and have had excellent results. Just keep in mind that if you're planning on broadcasting your project, you'll still need to view the final product on a scope to make sure your black levels and white levels are broadcast legal. This method is not designed to replace a calibrated monitor and scope, just like Kentucky Voicing is not designed to replace a well designed studio listening environment. It's just an extra tool you can use to help get the job done in a pinch.

If you'd like to read some of Dave Moulton's other gems of wisdom, you can do so at his company website at http://www.moultonlabs.com/

Tuesday, November 18, 2008

Color Temperature: When "white" isn't just white.


If you've ever heard someone talk about color temperature, you may have wondered what all the fuss is about.  What does temperature have to do with color?  Isn't "white" simple enough to understand on it's own?

The short answer is no.  Now, here's the longer answer:

You may remember from elementary school that white is defined as the presence of all color. This was usually demonstrated by taking a white light and shining it through a prism to create a lovely little rainbow.  This is the same reason rainbows often appear on sunny days through mists of water hanging in the air.

In order for an object to appear to be white, it must reflect back all of the colors contained within the light that is reflecting off it's surface.  If one or more of the colors of the spectrum are missing from either the light source or the reflected light, the object will appear to have a color.  The color of an object is determined mainly by the light source illuminating the object.

This is where color temperature comes into the equation.  Marketing departments like to describe color temperatures using terms like "cool white" or "warm white", but in film and video, these terms are just not specific enough for our purpose.  Instead, we describe the temperature of a light in degrees Kelvin.

The Kelvin Scale

If you've taken a high school chemistry or astronomy class, you may already be familiar with the kelvin scale.  Technically speaking, it is a thermodynamic temperature scale, and one of the SI base units from which all other units of measurements can be derived.  (For the technically curious, the other SI base units are meter, kilogram, second, ampere, mole and candela.)

The most commonly known temperature on the kelvin scale (noted with the symbol "K") is zero degrees kelvin, also known as Absolute Zero.  This is the theoretical temperature at which there is no thermal energy and all life ceases to exist.  But from a lighting standpoint, the low end of the kelvin scale doesn't concern us.  We are interested in much higher temperatures... mostly those in the 1800K to 5600K range.

Temperature = Color

Looking up into the sky on a clear starry night you will notice that no two stars are exactly the same color.  This is because no two stars burn at exactly the same temperature.  Our own star Sol (aka. The Sun) is estimated to have a surface temperature of approximately 5,600K.  Sirius, the brightest star in the Orion constellation has a temperature of approximately 9,800K and appears blue while Antares, the brightest star in Scorpio, appears red and has a temperature of 3,400K.

Rather than going through mathematical formulas and extensive data, let's just simplify the issue and say that lower temperatures will give the light a red hue, while higher temperatures will appear more blue.  The hotter something burns, the more blue it appears.  The cooler it burns the more red it will appear.

Keeping with this concept, lighting manufacturers rate their lights based on color temperature.  A light with a color temperature of 5,600K is said to be a "cool white" or "sunlight balanced", whereas a tungsten light bulb has a temperature of 3,200K.  Fluorescent lights, which often appear with a greenish tint have an approximate color temperature of 4,600K.

It's important to note that these are color temperatures not actual temperatures.  In other words, the color of the light approximates the color of a star burning at a certain temperature Kelvin.  Obviously, the light bulbs in your house are not as hot as the star Antares...

Determining What "White" Looks Like

Taking into account the light source shining on an object, we can see that changes in the color of the light will affect the color of a "white" object.  A "white" piece of paper in direct sunlight will appear more "blue" than the same piece of paper lit by candlelight.

Fortunately (or unfortunately depending on how you look at the problem) the human brain has an automatic compensation device built in to eliminate these inconsistencies.  If you look at a white piece of paper outside, it looks... well... white.  Take the same piece of paper inside  and look at it under a tungsten light bulb and it still looks white.  Your brain continuously adjusts itself to take lighting conditions into account when determining color.

If you're bored one night and want to see this effect in action, try the following:  Turn off all the lights in your house and turn on a TV set in a room with a window.  Now, go outside and wait a few minutes for your eyes to adjust.  If you look back at your house, you'll see an eerie blue glow coming from the room with the TV set.  Go back inside and everything looks normal.

Cameras and White Balance

Since film and video cameras don't have the advantage of containing a human brain, we need to take these issues into account and tell the camera what it should see as white.  We do this by choosing an appropriate film stock (daylight or tungsten) or white balancing the video camera for a certain light temperature.  Then, make sure that all of the light sources that are being used match the camera white balance settings.  Pick one color temperature and make sure everything is matched.

To help keep things balanced, there are also a number of different filters and gels available to help convert one color temperature of light to another.  For example, if you are shooting in an apartment with one window, you can light the scene with tungsten (3200K) and can cover the window with a #85 gel to convert the sunlight (5,600K) to match the tungsten lights.  Alternatively, you can put some CTB gels on your tungsten lights to bring their color temperature closer to that of sunlight.  It all depends on your goals for lighting the scene.

If we don't give the camera a specific color temperature reference, or worse yet, use different color temperatures of light you will get some rather unexpected results.  Your brain may be able to deal with multiple color temperatures of light, but cameras can not.

Monday, November 17, 2008

New Video releases "4th Dimension" through Apple iTunes


New Video has recently released 4th Dimension, a grainy, fun indie film on iTunes.

According to Jessica Trusiani of New Video, 4th Dimension "...explores the dark world between dreams and reality.  Jack is an antique shop worker who becomes obsessed with analyzing time after finding Albert Einistein's journal on his unsolved Unified Field Theory."

You can visit iTunes to preview or download the film by clicking here.

For more information about the film or New Video's other releases, contact Jessica Trusiani at New Video, 902 Broadway, New York, NY 10010.

Sunday, November 9, 2008

"Bumping off Burt" Receives Finishing Touches Before Release


After nearly three years in production, Q Station's debut feature length comedy Bumping off Burt is receiving a few last minute finishing touches before it's anticipated release in early 2009.

Written by acclaimed mystery novelist Malcolm McClintick, Bumping off Burt is the story of a group of friends and patrons of "Duffy's Diner" who, after months of dealing with the gross antics of Burt, decide the only way to rid themselves of this menace is murder.  When the inept hit man they hire turns up missing, the group decides to take matters into their own hands.

The film went into pre-production in the spring of 2006 and filmed over a period of twenty-one days later that summer.  Post production began on the film in late September and continued for more than a year.  On February 5th, 2007, the film held it's first test screening for more than 200 invited guests at the historic Cinema Paradiso theater in downtown Fort Lauderdale, Florida.

During it's initial screening the film tested very well, achieving 72% in the "top two boxes" with more than 91% of the respondents indicating they would "definitely recommend the film to a friend."  According to Robert Marich in his book Marketing to Moviegoers, films which score less than 55-65% are generally a cause for worry in Hollywood.  If the initial audience response and screen test are any indication, Bumping off Burt is in the clear.

As with any successful film, Bumping off Burt only exists because of the hard work and dedication of the talented cast and crew, many of whom will be able to claim the film as their first feature length project.

The ensemble cast includes Bryan Power as "Harry", a down and out attorney; Bruce Linser (Drop Dead Gorgeous) as "Paul", one of Duffy's more flamboyant patrons; Michael Kebe (Gringo Wedding) and Elisabeth Boggio as co-workers "Mike" and "Kristin"; and David William Cabrera as the unimaginably gross and disgusting "Burt".

Additional cast members include Sarah O'Kelly (The Great Train Robbery), Amber Crawford, Barbara Perez (Street Survival), Amy Nathan (My Sexiest Year), Lorenzo Toledo (Kings of South Beach), Robert Schlegel, and Mark Demeter (Foreverglades).

For more information visit the film's official web site at www.bumpingoffburt.com